Node-RED: Publish History Data
Introduction
Node-RED is an low-code platform for writing automation tasks. It can communicate with Brewblox APIs using MQTT and REST.
This tutorial shows how to publish Brewblox history data that can then be viewed in graphs.
We'll assume a basic familiarity with Node-RED, MQTT, and Brewblox history data. For introductions on these topics, see:
Setup
To add the Node-RED service, see our setup guide.
When this is done, you can access the Node-RED web UI at {BREWBLOX_ADDRESS}/node-red.
Flow
For this tutorail, we'll query the system memory diagnostics, and publish the result to the Brewblox history database.
To do this, we need to:
- Periodically trigger the Node-RED flow.
- Call the system diagnostics tool.
- Convert the raw output of the system diagnostics tool into something we can publish.
- Send the formatted data to the Brewblox eventbus.
Getting raw data
In this flow, we're not responding to external inputs, but periodically fetching data.
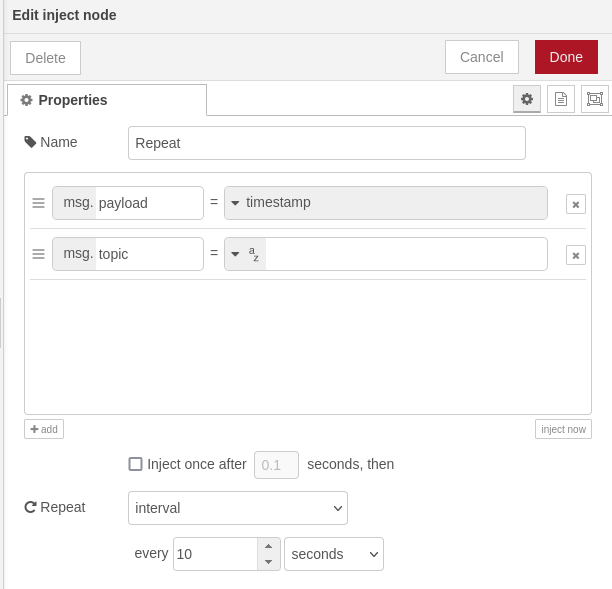
To get this process started, first create an inject node, and set it to repeat every 10 seconds.
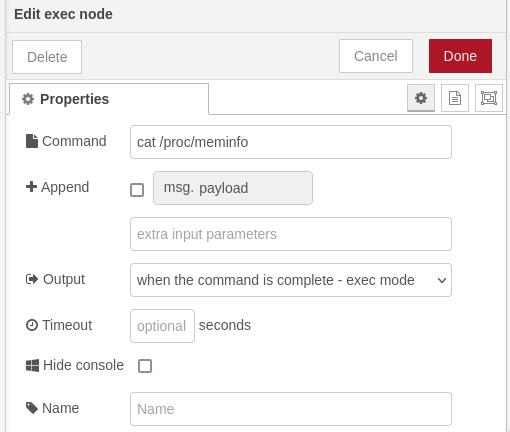
To get the actual data, create an exec node, with the command cat /proc/meminfo.
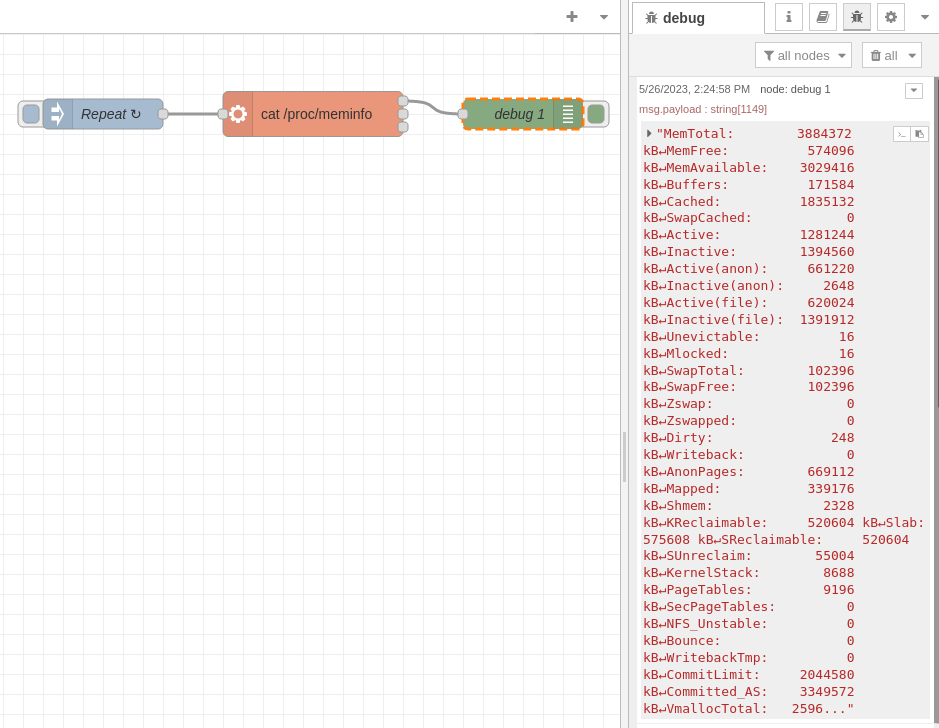
Add a debug node to see the stdout output from the exec node, and deploy the nodes.
Now, when you open the debug tab in the right side bar, you'll see the raw output from the cat /proc/meminfo command.
Formatting data
The raw data is incompatible with the Brewblox history format, and would be ignored if published. We need to convert it to a JSON object with the correct fields.
To do this, create a function node, with this javascript code:
const key = 'meminfo';
const data = {};

for (const line of msg.payload.split('\n')) {
    // example line: 'MemTotal:        3884372 kB'
    const words = line
        .replace(':', '')
        .split(' ')
        .filter((s) => s !== '');

    // Example:
    // data['MemTotal[kB]'] = 3884372;
    data[words[0] + '[kB]'] = parseInt(words[1]);
}

msg.payload = { key, data };

return msg;
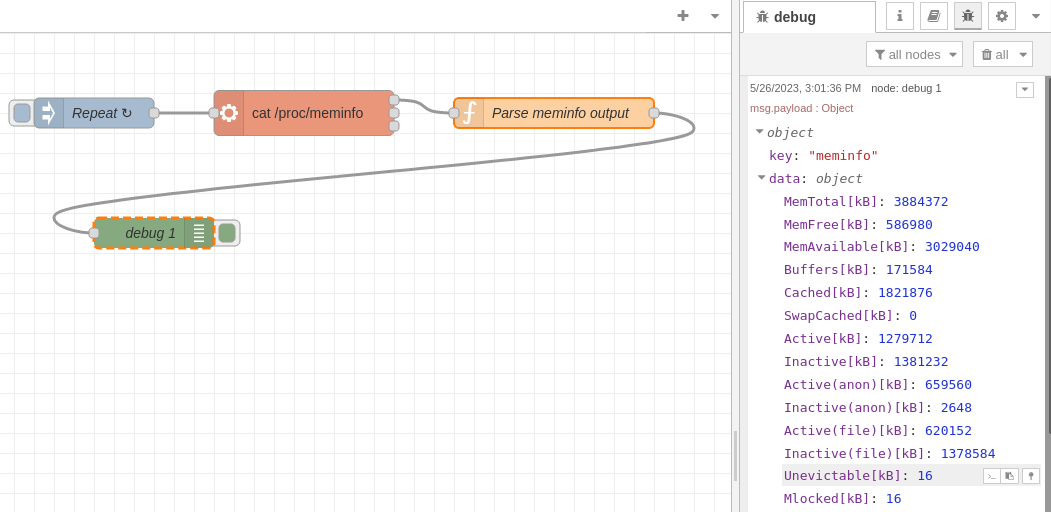
Attach the function node to the exec stdout, and move the debug node to the function output. Deploy the nodes, and the debug output changes to the formatted data.
Publishing to MQTT
Because the node-red service runs inside the Brewblox network, we can connect to the eventbus directly at eventbus:1883. For a more in-depth explanation, see the routing guide.
TIP
If you're running Node-RED externally, the eventbus address is {BREWBLOX_ADDRESS}:1883
To publish, we need a mqtt out node. Add it, and double click to edit settings.
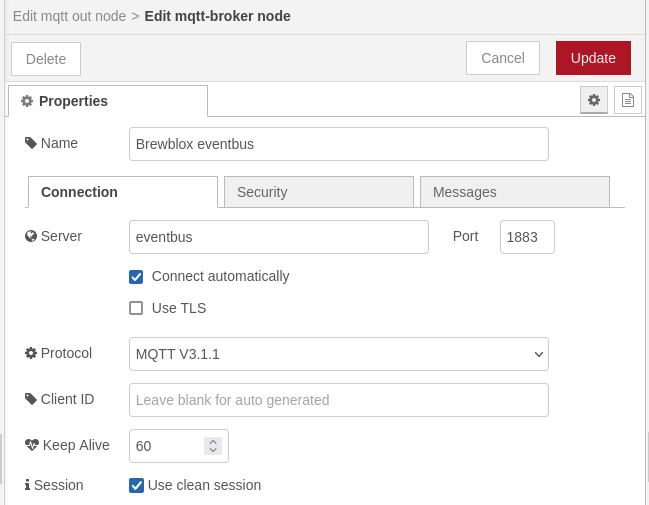
If you already have a "Brewblox eventbus" broker from the Using blocks in Node-RED tutorial, you can re-use this. Otherwise, add a new mqtt-broker config node. The Server should be eventbus.
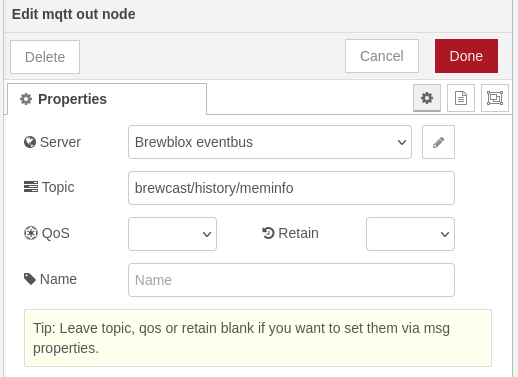
In the mqtt out node, set the Topic to brewcast/history/meminfo.
Connect the output of the function node to the mqtt out node, and deploy the nodes.

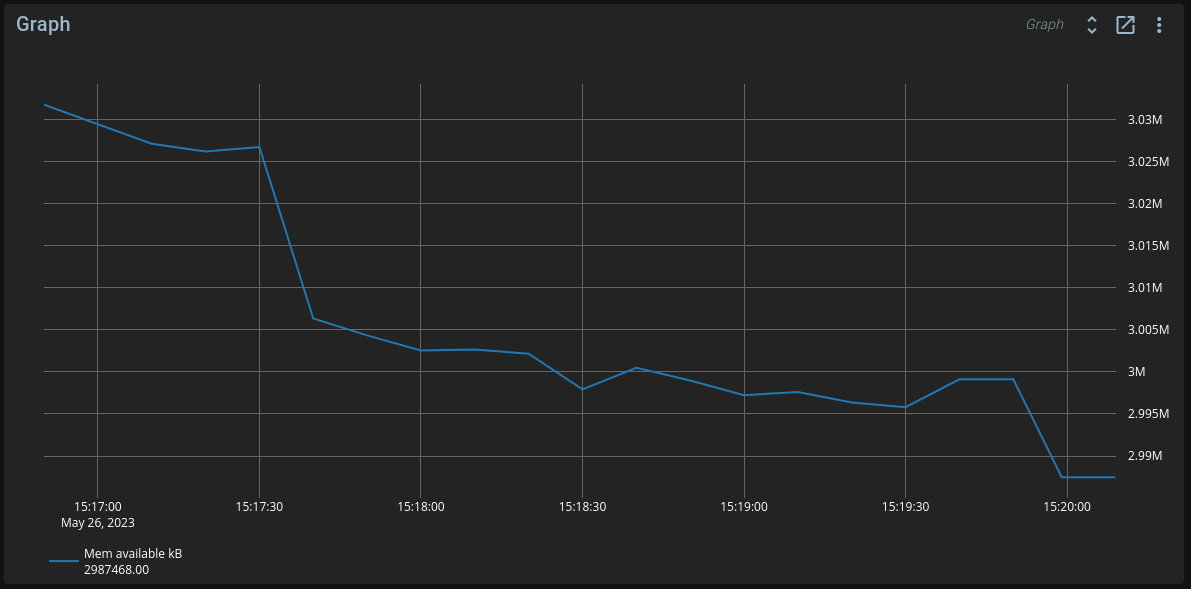
To see the results, create a new Graph in Brewblox, and select the new fields under meminfo.
Source
[{"id":"f3401d5ed8270c60","type":"tab","label":"Publish history","disabled":false,"info":""},{"id":"9b695b94.32347","type":"mqtt-broker","name":"Brewblox eventbus","broker":"eventbus","port":"1883","clientid":"","autoConnect":true,"usetls":false,"compatmode":false,"protocolVersion":"4","keepalive":"60","cleansession":true,"birthTopic":"","birthQos":"0","birthPayload":"","birthMsg":{},"closeTopic":"","closeQos":"0","closePayload":"","closeMsg":{},"willTopic":"","willQos":"0","willPayload":"","willMsg":{},"userProps":"","sessionExpiry":""},{"id":"e178443b43d89a8f","type":"inject","z":"f3401d5ed8270c60","name":"Repeat","props":[{"p":"payload"},{"p":"topic","vt":"str"}],"repeat":"10","crontab":"","once":false,"onceDelay":0.1,"topic":"","payload":"","payloadType":"date","x":780,"y":80,"wires":[["cea435bb258ba023"]]},{"id":"cea435bb258ba023","type":"exec","z":"f3401d5ed8270c60","command":"cat /proc/meminfo","addpay":"","append":"","useSpawn":"false","timer":"","winHide":false,"oldrc":false,"name":"","x":990,"y":80,"wires":[["f43208cf69d6829c"],[],[]]},{"id":"f43208cf69d6829c","type":"function","z":"f3401d5ed8270c60","name":"Parse meminfo output","func":"const key = 'meminfo';\nconst data = {};\n\nfor (const line of msg.payload.split('\\n')) {\n // example line: 'MemTotal: 3884372 kB'\n const words = line\n .replace(':', '')\n .split(' ')\n .filter((s) => s !== '');\n \n // Example:\n // data['MemTotal[kB]'] = 3884372;\n data[words[0] + '[kB]'] = parseInt(words[1]);\n}\n\nmsg.payload = { key, data };\n\nreturn msg;","outputs":1,"noerr":0,"initialize":"","finalize":"","libs":[],"x":1240,"y":80,"wires":[["4e98ebbf6f0de136"]]},{"id":"4e98ebbf6f0de136","type":"mqtt out","z":"f3401d5ed8270c60","name":"","topic":"brewcast/history/meminfo","qos":"","retain":"","respTopic":"","contentType":"","userProps":"","correl":"","expiry":"","broker":"9b695b94.32347","x":1090,"y":180,"wires":[]}]